Casio HK1223 User Manual
Browse online or download User Manual for Laptops Casio HK1223. Casio HK1223 User Manual
- Page / 147
- Table of contents
- TROUBLESHOOTING
- BOOKMARKS
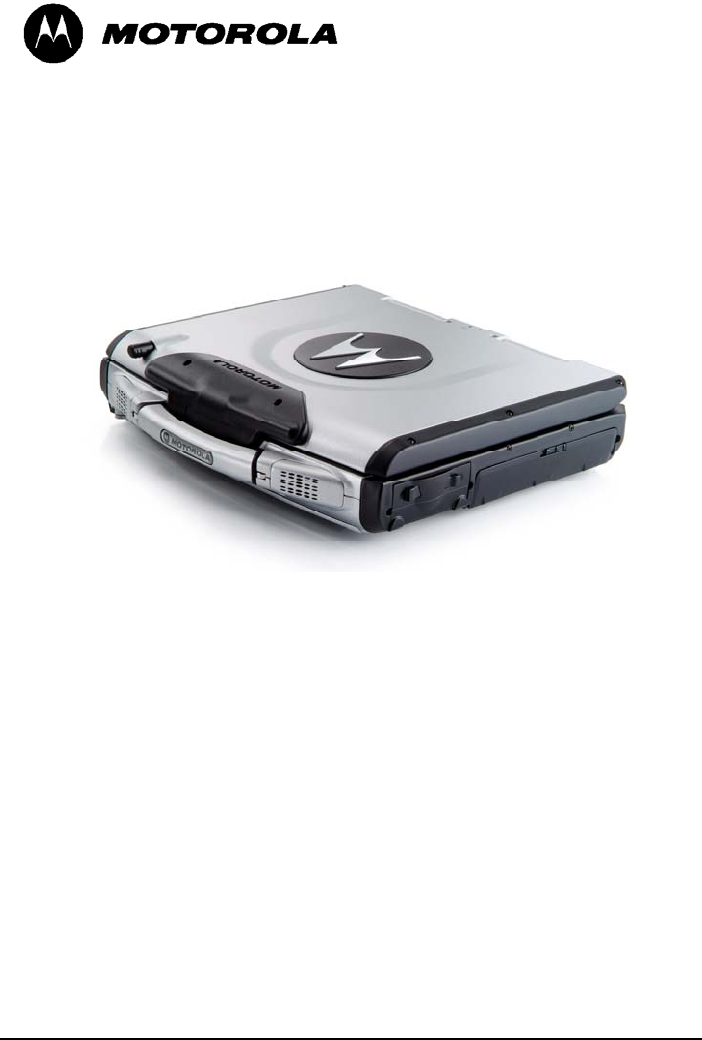
- Mobile Laptop 900™ 1
- Operation Manual 2
- Regulations Information 4
- FCC RF Exposure Statement 5
- Facilities 7
- Aircraft 7
- Operational Warnings 8
- Operational Cautions 9
- LIMITED WARRANTY 14
- II. GENERAL PROVISIONS: 16
- V. GOVERNING LAW 18
- About the Battery 20
- About the Modem 21
- Table of Contents 23
- xxiii 26
- Preface 28
- Notational Conventions 29
- Getting Started 30
- Getting the Computer Running 31
- Opening the Cover 33
- Turning Off 34
- Right-Side Components 35
- Left-Side Components 36
- Rear Components 37
- Front Components 38
- Bottom-Side Components 39
- Top-open Components 41
- Where to Go from Here 43
- Operating Your Computer 44
- Starting the Computer 45
- Stopping the Computer 45
- To stop in 46
- Do this… To start up or 46
- Using the Keyboard 47
- Cursor-Control Keys 48
- Numeric Keypad 48
- Euro Symbol 49
- Windows Keys 49
- Function Keys 49
- Hot Keys 50
- Using the Touchpad 52
- Configuring the Touchpad 54
- Using the Hard Disk Drive 56
- DVD drive 58
- 2-16 Operating Your Computer 59
- Problems” in Chapter 8.) 59
- Using the Video Features 60
- Using the Audio Features 62
- Connecting Audio Devices 63
- Using the LAN 64
- 2-22 Operating Your Computer 65
- Proset not Windows 67
- Using the Modem 68
- 2-26 Operating Your Computer 69
- Using the GPS (option) 70
- Using the Bluetooth (option) 71
- Managing Power 73
- AC Adapter 74
- Battery Pack 75
- Checking the Battery Level 76
- Replacing the Battery Pack 77
- 3-6 Managing Power 78
- Power Management 79
- Hibernation 80
- Power-Saving Tips 81
- 3-10 Managing Power 82
- Expanding Your Computer 83
- 4-2 Expanding Your Computer 84
- Connecting a USB Device 85
- Connecting a Serial Device 86
- Connecting an IR Device 87
- 4-6 Expanding Your Computer 88
- Expanding Your Computer 4-7 89
- System Memory Upgrade 90
- CHAPTER 91
- When to Use 92
- Starting SCU 92
- Main Menu 94
- Internal Numlock 95
- USB Emulation 95
- Advanced Menu 96
- Shared Video Memory 97
- COM Ports 98
- HDD Heater 98
- Security Menu 99
- SCU Password 100
- Hard Disk Boot Sector 100
- Boot Menu 101
- Exit Menu 102
- Installing Software Drivers 103
- How to Use the Driver CD 104
- Drivers on the First Page 105
- Drivers on the Second Page 106
- Drivers on the Three Page 107
- Caring for the Computer 121
- Protecting the Computer 122
- Taking Care of the Computer 123
- Cleaning Guidelines 124
- Battery Pack Guidelines 124
- When Traveling 125
- 7-6 Caring for the Computer 126
- Troubleshooting 127
- Preliminary Checklist 128
- Solving Common Problems 129
- Battery Problems 130
- Bluetooth Problems 130
- DVD Drive Problems 131
- Display Problems 132
- Hardware Device Problems 133
- Hard Disk Drive Problems 134
- Infrared Problems 134
- LAN Problems 135
- WLAN Problems 136
- Modem Problems 137
- Power Management Problems 138
- Software Problems 138
- Sound Problems 139
- Startup Problems 139
- Other Problems 140
- Resetting the Computer 141
- 8-16 Troubleshooting 142
- Specifications 143
- A-2 Specifications 144
- APPENDIX 145
- Finger Placement 146
- Utility 147
Summary of Contents
i Mobile Laptop 900™ Pentium M Model (Model # HK1223) Motorola, Inc. All rights reserved Owner’s Manual R01 Part N
vii LICENSE AGREEMENT MOTOROLA, INC. (“MOTOROLA”) IS WILLING TO LICENSE THE SOFTWARE EMBEDDED IN THE ENCLOSED PRODUCT (THE “SOFTWARE”) TO YOU ONLY
5-10 Setup Configuration Utility (SCU) Allows you to set the password for your system. When typing the password, first make sure that Num Lock is of
Setup Configuration Utility (SCU) 5-11 Boot Menu Boot Sequence Sets the first, second, third, and fourth booting device. The system will try to boo
5-12 Setup Configuration Utility (SCU) Exit Menu Save Changes and Exit Saves the changes you have made and exit the SCU program. Discard Changes an
CHAPTER 6 Installing Software Drivers To take full advantage of the unique features of your computer, some operating systems require custom software
6-2 Installing Software Drivers How to Use the Driver CD NOTES: • The drivers may have been updated after this manual was published. For driver u
Installing Software Drivers 6-3 Drivers on the First Page To install the necessary driver, just click on the particular option and follow the onscre
6-4 Installing Software Drivers Upon clicking “Next Page,” the following screen appears: Drivers on the Second Page IrDA
Installing Software Drivers 6-5 Drivers on the Three Page TouchScreen Click on the TouchScreen button to install touch screen driver.
6-6 Installing Software Drivers Install Touch Screen Driver for Windows 2000, Windows XP 1. After the system has finished rebooting, click on the
Installing Software Drivers 6-7 NOTE 1. If you play game with CRT or DVI monitor, please select “Twin” to display the screen.
viii 2.5 You shall not export, re-export, resell, ship or divert or cause to be exported, re-exported, resold, shipped, or diverted, directly or ind
6-8 Installing Software Drivers 2. When you use Windows Media Player to play a video file, the screen many flashes ina very short time. This behavi
Installing Software Drivers 6-9 3. CANCEL [Use overlays]->Click [OK]. Step 4. Close the Windows Media Player, and then restart the Wi
6-10 Installing Software Drivers greater the accuracy. Errors in calibration may occur due to viewing angle, or individual skill, and there may be l
Installing Software Drivers 6-11 Fig1 Fig2
6-12 Installing Software Drivers 3. If the Graphics Controller setting “Extended Desktop” and Primary Device is Monitor , the Touch Screen setting y
Installing Software Drivers 6-13 Advanced Calibration The Advanced Calibration function improves the accuracy of calibration by using more involved
6-14 Installing Software Drivers 2. Please cancel the function “Automatic Rotation Detection”. (See Fig1) Because use the function key “Fn + F9 “(C
Installing Software Drivers 6-15 Fig1
6-16 Installing Software Drivers Fig2 3. If the Graphics Controller setting “Extended Desktop” and Primary Device is Monitor , the Touch Scree
Installing Software Drivers 6-17 Fig1 PS. If your O.S. shutdown and docking un-dock and then enter system, please re- Calibration you
ix Section 5 RIGHT TO USE MOTOROLA’S NAME You shall not, during the term of this Agreement or thereafter, use any trademark of Motorola, or any wor
6-18 Installing Software Drivers
CHAPTER 7 Caring for the Computer Taking good care of your computer will ensure a trouble-free operation and reduce the risk of damage to your compu
7-2 Caring for the Computer Protecting the Computer To safeguard the integrity of your computer data as well as the computer itself, you can protect
Caring for the Computer 7-3 Taking Care of the Computer Location Guidelines Use the computer where the temperature is between 0 °C (32 °F) and 50
7-4 Caring for the Computer Cleaning Guidelines Never clean the computer with its power on. Use a soft cloth moistened with water or a non-alk
Caring for the Computer 7-5 When Traveling Before traveling with your computer, make a backup of your hard disk data into optical discs or other
7-6 Caring for the Computer
CHAPTER 8 Troubleshooting Hardware, software, or a combination of both can cause computer problems. When you encounter any problem, it might be a ty
8-2 Troubleshooting Preliminary Checklist Here are helpful hints to follow before you take further actions when you encounter any problem: Try to
Troubleshooting 8-3 Solving Common Problems For easy reference, the problems are divided into these categories. Problem Type Go to Battery Problems
x Section 10 LIMITATION OF LIABILITY MOTOROLA’S TOTAL LIABILITY UNDER THIS AGREEMENT FOR DAMAGES SHALL NOT EXCEED THE TOTAL AMOUNT PAID BY YOU FOR TH
8-4 Troubleshooting Battery Problems The battery does not charge (Battery Charge indicator does not light amber). Make sure that the AC adapter is
Troubleshooting 8-5 I cannot end a Bluetooth connection. If another device is connected to your computer, you can either end the connection using
8-6 Troubleshooting Display Problems Nothing appears on the screen. If the power-on indicator is not on, check the electrical outlet, the plugs an
Troubleshooting 8-7 Make sure that the monitor’s signal cable is properly connected. Switch the display to the monitor by pressing Fn+F9, or ch
8-8 Troubleshooting Hard Disk Drive Problems The hard disk drive error message appears on the screen. Insert a bootable diskette and check the int
Troubleshooting 8-9 Make sure that the IR ports are clean. Keyboard, Mouse and Touchpad Problems The keyboard does not respond. Try connecting
8-10 Troubleshooting WLAN Problems I cannot use the WLAN feature. Make sure that the Mini PCI WLAN card is correctly installed. Make sure that
Troubleshooting 8-11 If the operating radio channel is in poor quality, change the Access Point and all the wireless station(s) within the BSSID t
8-12 Troubleshooting Power Management Problems The computer does not enter Standby or Hibernation mode automatically. If you have a connection to
Troubleshooting 8-13 Sound Problems No sound is produced. Make sure that the volume control is not set too low. Make sure that the audio driver
xi The Software may contain one or more items of third-party software supplied by other third-party suppliers. The terms of this Agreement govern Y
8-14 Troubleshooting If you are using the battery power, make sure that the battery is not discharged. When you turn on the computer, it stops aft
Troubleshooting 8-15 Resetting the Computer You may have to reset (reboot) your computer on some occasions when an error occurs and the program you a
8-16 Troubleshooting
APPENDIXA Specifications NOTE: Specifications are subject to change without any prior notices. Parts Specifications CPU Intel Mobile Pentium Dotha
A-2 Specifications Parts Specifications Modem 56 K (V.90/V.92; 28,000 ~ 56,000 bits/s data rates) LAN 10/100 Base-T Ethernet Communications Othe
APPENDIXB Fingerprint Recognition System Your system features a fingerprint recognition system designed for computer security. It provides a high le
B-2 Fingerprint Recognition System Finger Placement When placing a finger to be enrolled or identified, slide the cover to expose the sensor matrix
Fingerprint Recognition System B-3 Using the Fingerprint Recognition System Utility NOTE: To take advantage of the fingerprint recognition system, th
xii If the affected product is being purchased pursuant to a written Communications System Agreement signed by Motorola, the warranty contained in th
xiii warranty. Because each system which may use the Product is unique, Motorola disclaims liability for range, coverage, or operation of the syste
xiv MOTOROLA DISCLAIMS ALL OTHER WARRANTIES OR CONDITIONS, EXPRESS OR IMPLIED INCLUDING THE IMPLIED WARRANTIES OR CONDITIONS OF MERCHANTABILITY AND F
xv I) A Product which, due to illegal or unauthorized alteration of the software/firmware in the Product, does not function in accordance with Mo
xvi States patent, that such purchaser will permit Motorola, at its option and expense, either to procure for such purchaser the right to continue us
ML900 Operation Manual (Pentium M Model # HK1223) Part Number:799001147001 7990 0114 3001 R01 (April 2006)
xvii About the Battery Caution Texts Concerning Lithium Batteries DANISH ADVARSEL! Lithiumbatteri – Eksplosionsfare ved fejlagtig håndtering. Udski
xviii FRENCH ATTENTION: II y a danger d’explosion s’il y a remplacement incorrect de la batterie. Remplacer uniquement avec une batterie du même type
xix 4. Connect the adapter to a proper power source. The voltage requirements are found on the product case and/or packaging. 5. Do not use the a
xx Table of Contents Preface...vii Chapter 1 Getting Started...
xxi Numeric Keypad ...2-5 Euro Symbol ...
xxii Power-Saving Tips...3-9 Chapter 4 Expanding Your Computer...
xxiii Battery Pack Guidelines...7-4 When Traveling...
xxv Preface This manual contains information that will help you operate the computer. It is divided into 8 chapters and 3 appendices. Chapter 1, Ge
xxvi Appendix B, Fingerprint Recognition System, provides information on using the system’s fingerprint recognition system. Notational Conventions T
TRADEMARKS All brand and product names are trademarks or registered trademarks of their respective companies. NOTE Information in this
CHAPTER 1 Getting Started Congratulations on purchasing this computer. This high performance notebook computer is especially designed for the practi
1-2 Getting Started Getting the Computer Running This section guides you through the procedures for getting the computer ready for operation. Unpacki
Getting Started 1-3 NOTE: Power Supply Cord: (optional) Detachable, minimum 1.5 m long. Listed, rated minimum 125 V, 7 A, having a 2/18 AWG, type SV
1-4 Getting Started CAUTION: When you disconnect the AC adapter, disconnect from the electrical outlet first and then from the computer. A reverse
Getting Started 1-5 3. Each time the computer is turned on, it performs a Power-On Self Test (POST), and the operating system such as Windows shou
1-6 Getting Started Taking a Look at the Computer This section identifies the external components of the computer and briefly describes the function
Getting Started 1-7 Left-Side Components Ref Component Description See Also IR Transceiver Connects an IrDA-compliant device for wireles
1-8 Getting Started Rear Components Ref Component Description See Also DVI-I Port Connects an external monitor with a DVI interface. P. 4-2
Getting Started 1-9 Front Components Ref Component Description See Also Wireless Modem Antenna Serves as the antenna for the optional
1-10 Getting Started Bottom-Side Components Ref Component Description See Also X-bay Module Antenna Connector Serves as the interfac
i Regulations Information Class B Regulations USA Federal Communications Commission Radio Frequency Interference Statement NOTE This equipment has
Getting Started 1-11 Ref Component Description See Also CPU Socket and Sealed CPU Cooling Fan Inside is the CPU of your computer and cooling fa
1-12 Getting Started Top-open Components Ref Component Description See Also Fingerprint Scanner Contains the fingerprint sensor. P. B-1 Keyb
Getting Started 1-13 Ref Component Description See Also Device Indicators Show the current status of the computer’s devices. Power on / Standby
1-14 Getting Started Where to Go from Here As your computer is ready for operation, you may want to do any of the following now: For this purpose… D
CHAPTER 2 Operating Your Computer This chapter provides information about the use of the computer. If you are new to computers, reading this chapter
2-2 Operating Your Computer Starting and Stopping the Computer There are a number of ways to start and stop the computer. Starting the Computer You a
Operating Your Computer 2-3 To stop in this mode… Do this… To start up or resume again Hibernation Depending on your settings in Windows, you can p
2-4 Operating Your Computer Using the Keyboard Your keyboard has all the standard functions of a full-sized computer keyboard plus a Fn key added for
Operating Your Computer 2-5 Cursor-Control Keys NOTE: The word “cursor” refers to the indicator on the screen that lets you know exactly where on y
2-6 Operating Your Computer Numeric keys facilitate entering of numbers and calculations. When Num Lock is on, the numeric keys are activated; meanin
ii • Consult the dealer or an experienced radio/TV technician for help. Any changes or modifications not expressly approved by the manufacturer coul
Operating Your Computer 2-7 Fn Key The Fn key, at the lower left corner of the keyboard, is used with another key to perform the alternative functio
2-8 Operating Your Computer Key Description Switches the display output to one of the following when an external device is connected. Upon booting
Operating Your Computer 2-9 Using the Touchpad CAUTION: Do not use a sharp object such as a pen on the touchpad. Doing so may damage the touchpad su
2-10 Operating Your Computer Term Action Point Move your finger on the pad until the cursor points to the selection on the screen. Click Press and
Operating Your Computer 2-11 Configuring the Touchpad You may want to configure the touchpad to suit your needs. For example, if you are a left-hand
2-12 Operating Your Computer Using the Touchscreen (option) CAUTION: Do not use a sharp object such as a ballpoint pen or pencil on the touchscreen.
Operating Your Computer 2-13 Using the Hard Disk Drive Your computer comes with a hard disk drive as drive C. A hard disk drive is a storage device
2-14 Operating Your Computer Using the DVD/Combo/DVD Dual Drive Depending on the model, your computer comes with a DVD, Combo, or DVD Dual drive loca
Operating Your Computer 2-15 The DVD/Combo/DVD Dual drive is classified as a Class 1 laser product. This label is located on the DVD/Combo/DVD Du
2-16 Operating Your Computer Inserting and Removing a Disc Follow this procedure to insert or remove a disc. 1. Turn on the computer. 2. Press the
iii Canada Radio Frequency Interference Requirements To prevent radio interference to the licensed service, this device is intended to be operated
Operating Your Computer 2-17 Using the Video Features The video subsystem of your computer features: 12.1-inch Display: 12.1-inch TFT (Thin-Film
2-18 Operating Your Computer NOTES: Before using the dual view capability, the video driver supplied with your computer must be installed. Syst
Operating Your Computer 2-19 Using the Audio Features NOTES: To take advantage of the enhanced audio capabilities, the audio driver supplied with
2-20 Operating Your Computer Connecting Audio Devices For higher audio quality, you can send or receive sound through external audio devices. Micr
Operating Your Computer 2-21 Using the Communication Features Using the LAN NOTE for Windows 2000: To take advantage of the LAN feature, the LAN dri
2-22 Operating Your Computer Using the Wireless LAN (option) Depending on your model, an internal Mini PCI wireless LAN (WLAN) card may have been pre
Operating Your Computer 2-23 authentication used by the currently used profile. Refer to Security Setting for more information. CCX Version Versio
2-24 Operating Your Computer WLAN card was provided by your dealer instead of the computer manufacturer, contact your dealer for the correct driver t
Operating Your Computer 2-25 3. Depending on the settings, you may be asked to enter a WEP key (refer to your Windows online help for more informat
2-26 Operating Your Computer The modem interfaces to the equipment’s controller by using the data interface port. The protocol supported over this li
iv Product Safety and RF Exposure Information Caution BEFORE USING THIS RUGGEDIZED LAPTOP , READ THIS SECTION WHICH CONTAINS IMPORTANT OPERATING INS
Operating Your Computer 2-27 Using the GPS (option) Navigation and positioning are crucial to so many activities and yet the process has always been
2-28 Operating Your Computer Using the MESH Modem (option) Motorola's MESH networking technology enables users to wirelessly access critical bro
Operating Your Computer 2-29 check with the manufacturers of other devices to determine their compatibility with your computer. NOTES: There may
CHAPTER 3 Managing Power Your computer operates either on external AC power or internal battery power. This chapter tells you how you can effectivel
3-2 Managing Power AC Adapter CAUTION: The AC adapter is designed for use with your computer only. Connecting the AC adapter to another device can
Managing Power 3-3 Battery Pack The battery pack is the internal power source for the computer. It is rechargeable using the AC adapter. The operati
3-4 Managing Power NOTE: The battery level may automatically lessen due to the self-discharge process (0.21% per day), even when the battery pack is
Managing Power 3-5 Replacing the Battery Pack CAUTION: There is danger of explosion if the battery is incorrectly replaced. Replace the battery o
3-6 Managing Power 5. Replace the battery pack compartment cover and secure the four screws. Battery Low Signals and Actions Battery Low occurs when
Managing Power 3-7 Power Management Your computer supports ACPI (Advanced Configuration and Power Interface) for power management. The power managem
v Medical Devices Pacemakers Keep the antennas of this data terminal at least 8 inches or 20cm away from any person’s body. Along with ensuring com
3-8 Managing Power Hibernation Hibernation is a very useful feature. People frequently open many applications when they use computers. It takes some
Managing Power 3-9 Power-Saving Tips In addition to your computer’s automatic power management, you can do your part to maximize the battery’s opera
3-10 Managing Power
CHAPTER 4 Expanding Your Computer You can expand the capabilities of your computer by connecting other peripheral devices. When using a device, be s
4-2 Expanding Your Computer Connecting an External Monitor If you want the benefits of a larger display screen with higher resolution, you can conne
Expanding Your Computer 4-3 Connecting a USB Device Your computer has two USB ports that supports transfer rates up to 12 MB/s for USB 1.1 devices a
4-4 Expanding Your Computer Connecting a Serial Device Your computer has a serial port for connecting a serial device such as an external modem. Fol
Expanding Your Computer 4-5 Connecting an IR Device Your computer has an IR (infrared) port for connecting an infrared-equipped device wirelessly su
4-6 Expanding Your Computer
Expanding Your Computer 4-7 Connecting a Video Capture Device NOTE: To take advantage of the AV input port, the Video Capture driver supplied with y
vi Potentially Explosive Atmospheres Turn off your ruggedized laptop prior to entering any area with a potentially explosive atmosphere. Do not remov
4-8 Expanding Your Computer System Memory Upgrade You can upgrade your computer by changing system memory to a maximum of 2 GB on the two 200-pin DD
CHAPTER 5 Setup Configuration Utility (SCU) SCU is a program for configuring the BIOS (Basic Input/Output System) settings of the computer. BIOS is
5-2 Setup Configuration Utility (SCU) When and How to Use the SCU Program When to Use You need to run the SCU program when: You see an error mess
Setup Configuration Utility (SCU) 5-3 Moving Around and Making Selections A brief description of keyboard usage is listed next: Key Function ←, →
5-4 Setup Configuration Utility (SCU) Main Menu Date and Time Sets the system time (Hour, Minute, Second) and date (Month, Day, Year).
Setup Configuration Utility (SCU) 5-5 Internal Numlock Sets if you can enter a number when Num Lock is turned off. When this item is enabled, you ca
5-6 Setup Configuration Utility (SCU) Advanced Menu Geyserville Support
Setup Configuration Utility (SCU) 5-7 Enables or disables the Geyserville feature of the CPU. The Geyserville feature helps conserve battery life by
5-8 Setup Configuration Utility (SCU) COM Ports Allows you to configure the COM ports of the computer. COM1 / 2 (FIR) / 3 / 5 / 6 Settings sets th
Setup Configuration Utility (SCU) 5-9 Security Menu Power-on Password
Related products and manuals for Laptops Casio HK1223
 (47 pages)
© 2020, manymanuals.com. All rights reserved. | 0.162 s |
 Manymanuals.com
 Manymanuals.de
 Manymanuals.fr
 Manymanuals.it
 Manymanuals.pl
 Manymanuals.cz
 Manymanuals.es
 Manymanuals-pt.com
Comments to this Manuals