Casio CELVIANO AP-33V User Manual Page 31
- Page / 50
- Table of contents
- TROUBLESHOOTING
- BOOKMARKS
- USER’S GUIDE 1
- GUÍA DEL USUARIO 1
- 427B-E-002A 2
- KEEP THESE INSTRUCTIONS 3
- IMPORTANT SAFETY INSTRUCTIONS 3
- FCC WARNING 4
- Introduction 5
- Safety Precautions 6
- WARNING 7
- 427B-E-008A 8
- 427B-E-010A 10
- Operational Precautions 11
- Main Features 12
- Contents 13
- General Guide 14
- CAUTION 15
- Back PanelBottom 15
- Basic Operation 16
- More about tones 17
- Using the Pedals 18
- Using the Metronome 19
- Using the Memory 20
- Playback 21
- Deleting Memory Contents 21
- Using Demo Tunes 22
- Keyboard Settings 23
- A4 = 440.0Hz 24
- 427B-E-025A 25
- Setting the Keyboard Channel 26
- Sending Memory Playback Data 26
- 427B-E-027B 27
- General MIDI 28
- MIDI Data Notes 29
- Troubleshooting 30
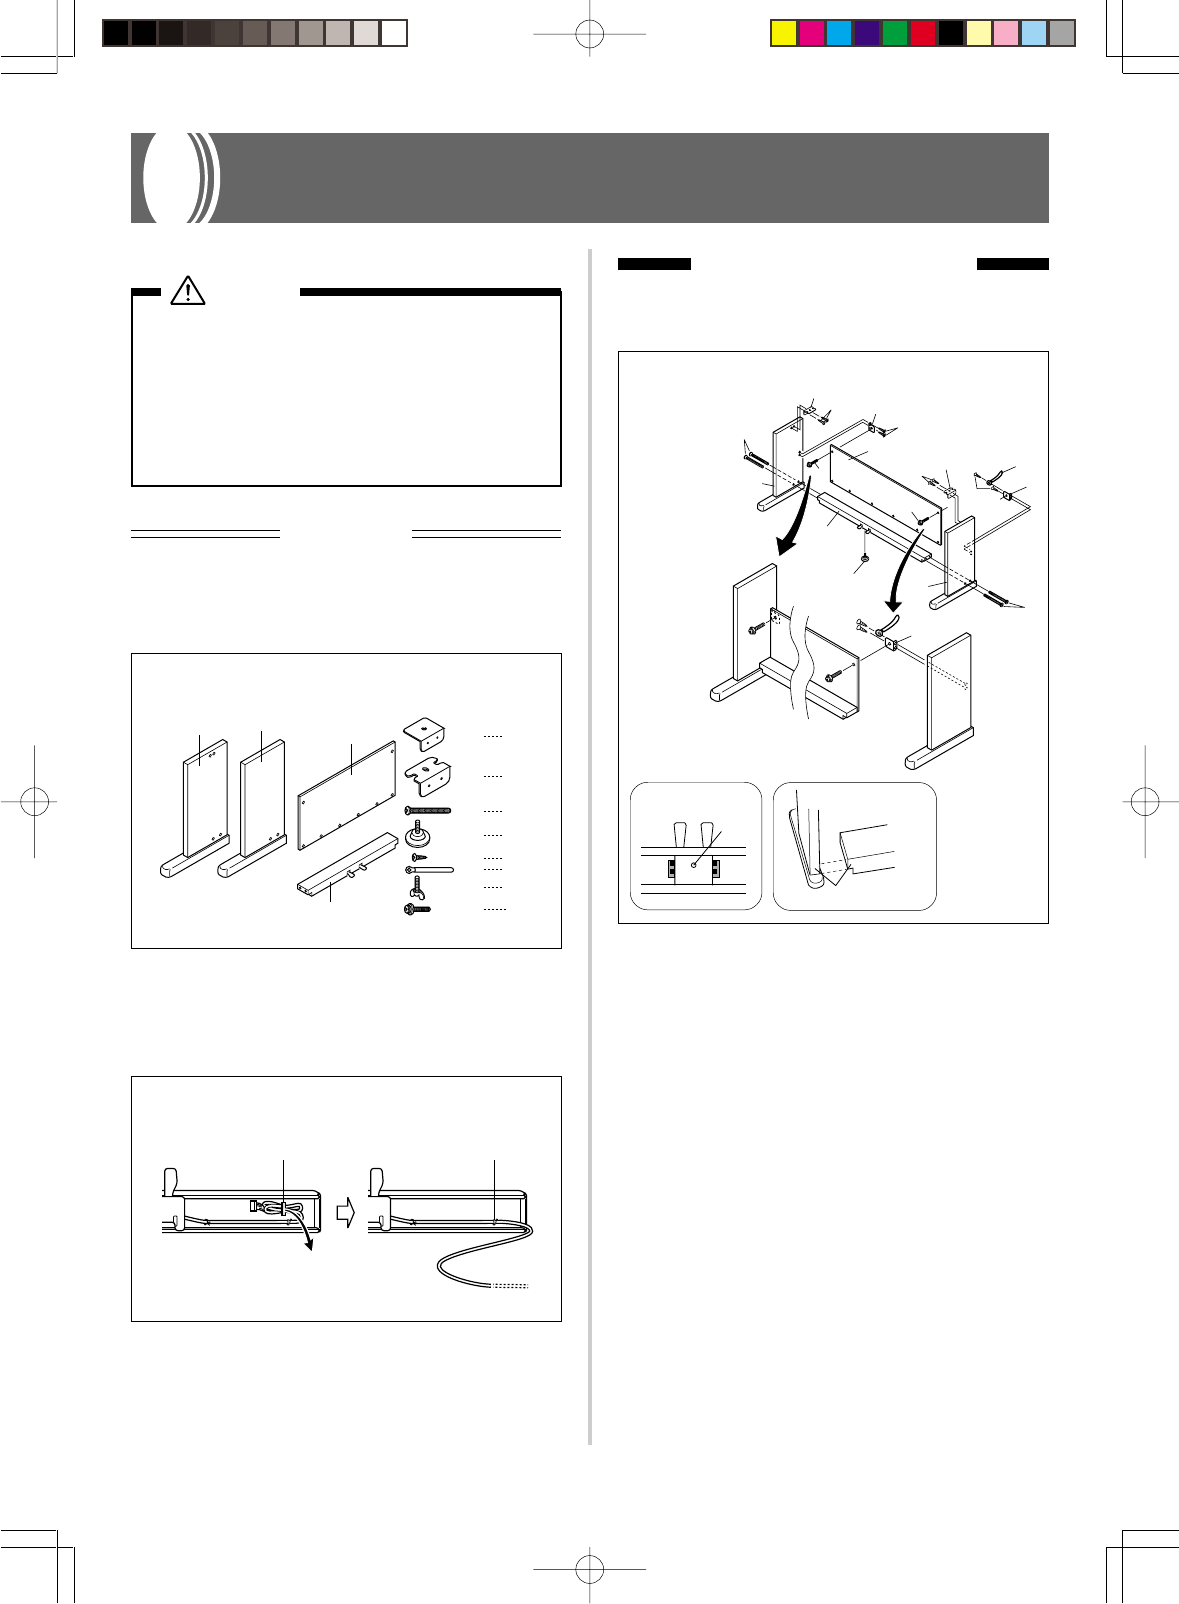
- Assembly Instructions 31
- 2 Installing the Keyboard 32
- Attachment of the Score Stand 33
- Specifications 34
- Appendix/Apéndice 35
- MIDI Data Format 36
- 427B-E-067B 37
- Portamento Control 38
- Brightness 38
- Filter Cut Off Frequency 39
- Filter Resonance 39
- Channel Mode Message 40
- Program Change 40
- Pitch Bend Change 40
- System Messages 41
- Formato de datos MIDI 42
- 427B-E-073B 43
- Régimen de vibrato 44
- Profundidad de vibrato 44
- Extinción de vibrato 44
- Frecuencia de corte de filtro 45
- Filtro de resonancia 45
- Mensaje de modo de canal 46
- Cambio de programa 46
- Mensajes de sistema 47
- Version: 1.0 48
- ❊❊❊❊❊❊❊❊❊❊❊❊❊❊ 49
- CASIO COMPUTER CO.,LTD 50
- 6-2, Hon-machi 1-chome 50
© 2020, manymanuals.com. All rights reserved. | 0.151 s |
 Manymanuals.com
 Manymanuals.de
 Manymanuals.fr
 Manymanuals.it
 Manymanuals.pl
 Manymanuals.cz
 Manymanuals.es
 Manymanuals-pt.com
Comments to this Manuals